Tune off - Tune on. Same RPMs
Demonstrating app control
WARNING! I am not responsible for you breaking your supercar! Follow this DIY at your own risk!!
For original discussion of this exhaust mod, please see this thread:
http://bmwi.bimmerpost.com/forums/sh....php?t=1335982
This mod is not for the faint of heart. If you have never tried modding your car this might not be the best place to start. However, with a little bit of work you can pull it off, and once you do the exhaust sounds amazing. The install took about 9 hours spread over 2 days. If I had this guide I could probably have done it in 2 hours. I emailed the seller in Romania a dozen times and he always responded within 5 minutes. I could not have done it without him, he is a standup guy. The instructions provided are great for the wiring, but the tricky part is running the wire into the cabin. I have cut and pasted some of the original instructions from Maxhaust for reference.
Let’s get started!
Package from Romania, arrived in about 1 week via UPS:

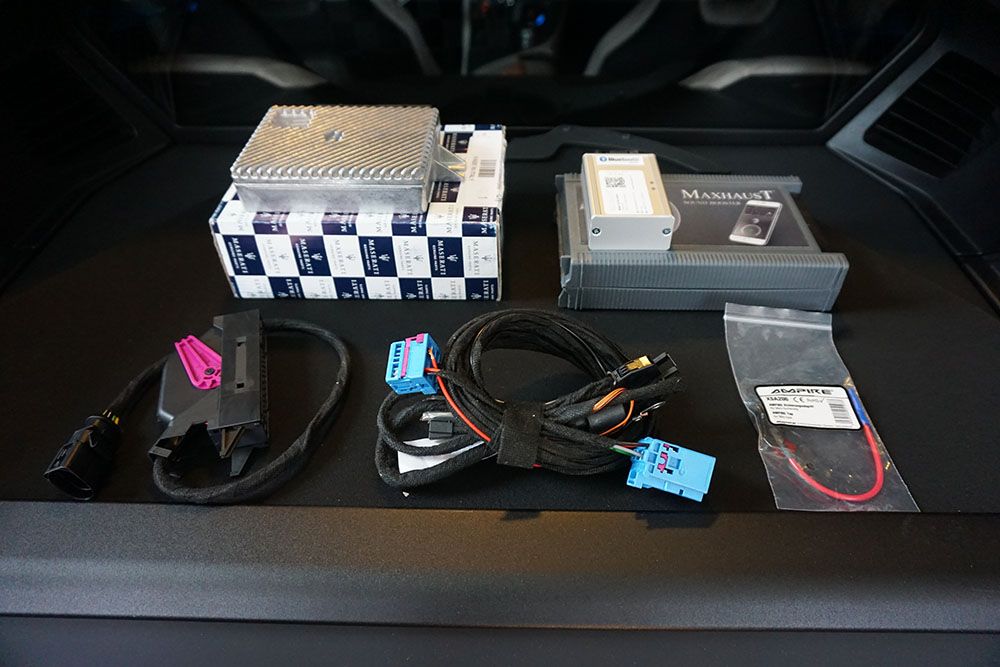
What you get in the box:
Tools you will need:
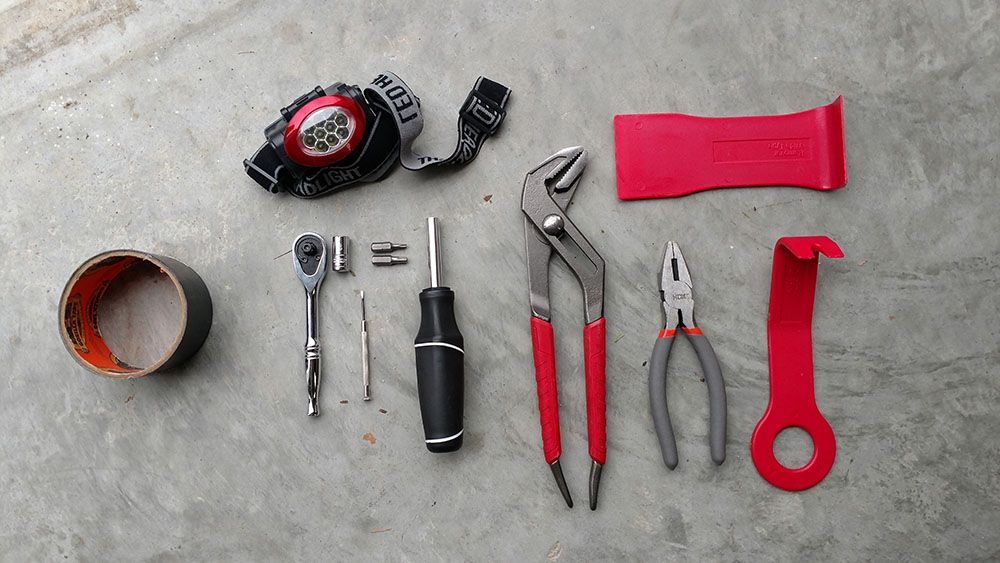
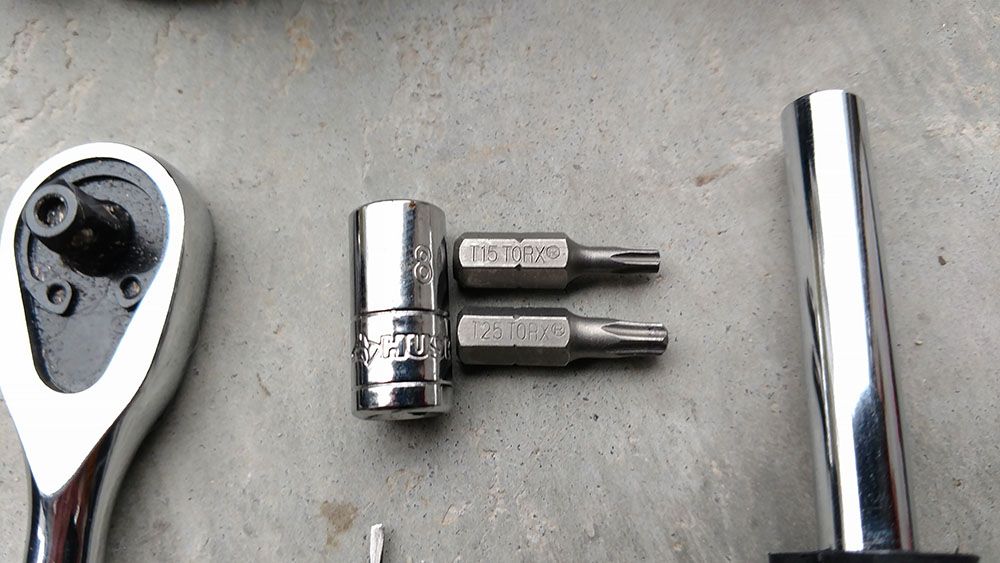
BMW always uses several different torx sizes, so you will need a T15 and T25 as well as a an 8mm socket wrench to attach the grounding wire.
You may also need a soldering gun, wire stripper, band-aid, and electrical tape, but that depends on whether you have more luck than I did with the wiring harness (see below).
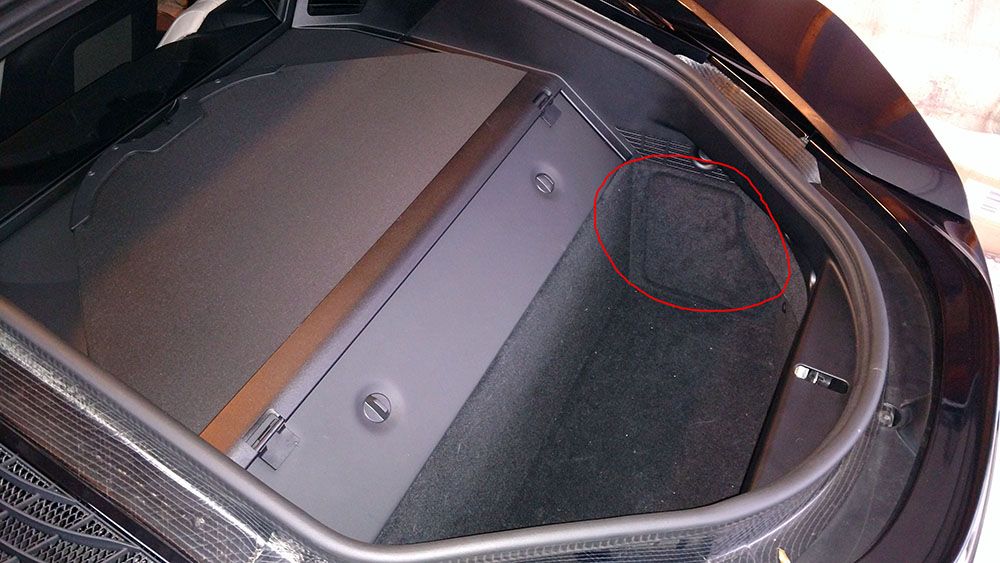
1. Remove the right felt panel from the trunk. You can use your fingers or a pry bar:
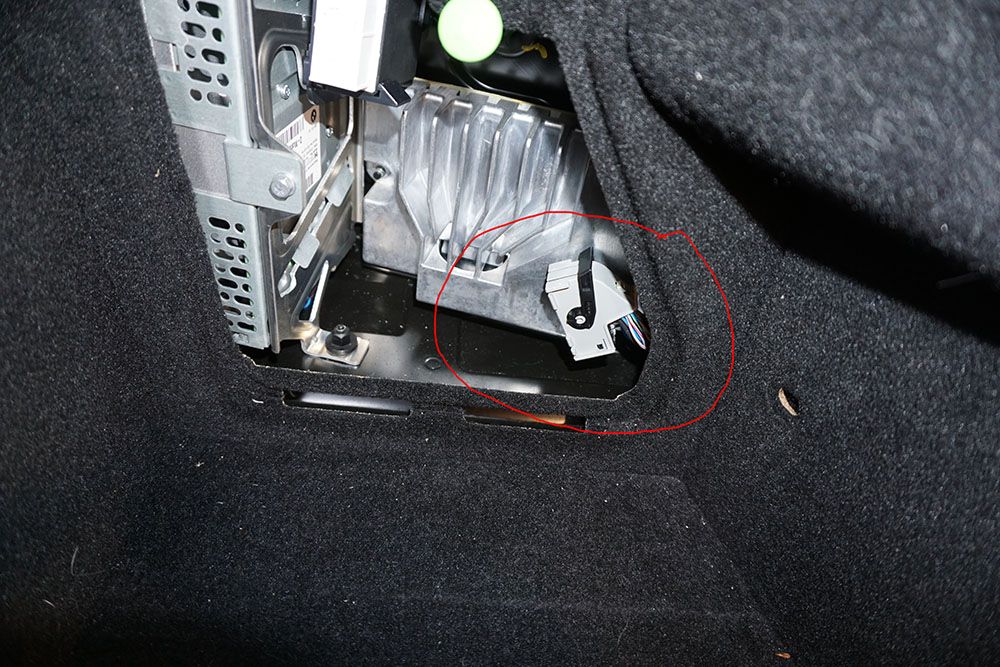
2. Remove the white plug from the amplifier. There is a black bar that flips down on top of the plug so that you can remove it.
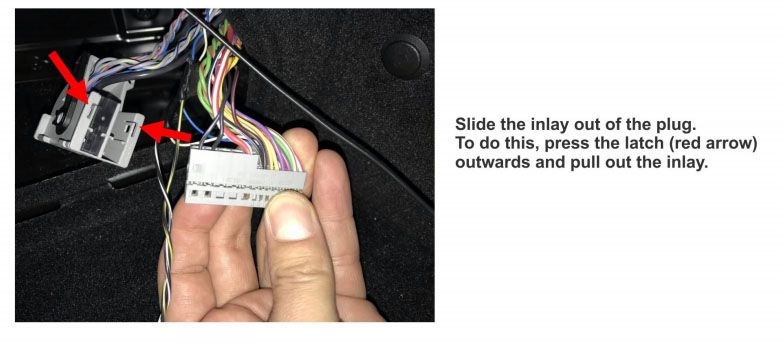
3. Remove the white section from the plug by pressing in on the tab on the side.
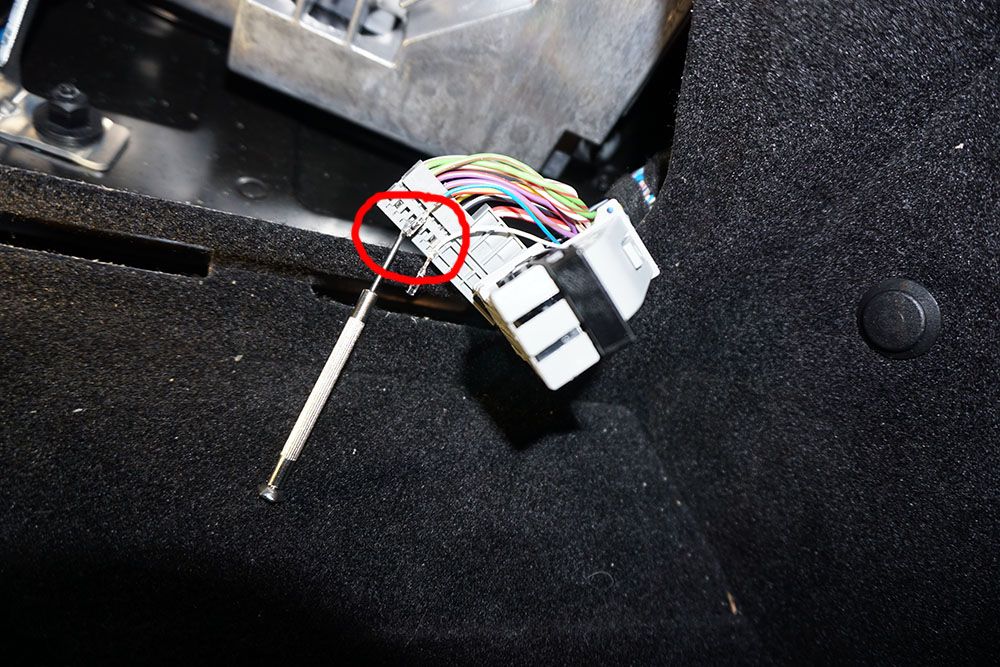
4. Remove the wires by pressing in on the ends of the wire with a jeweler’s screwdriver.
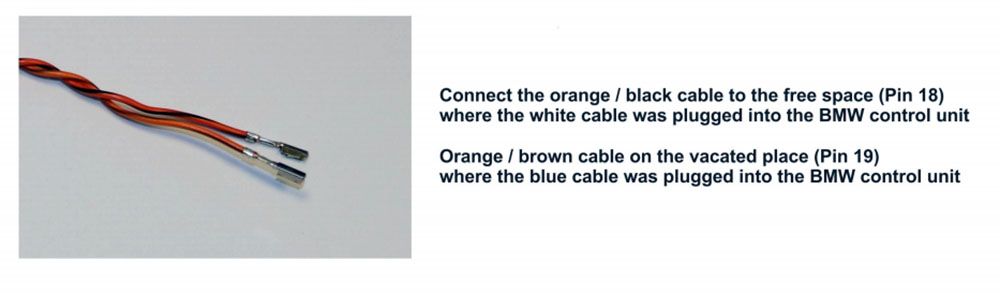
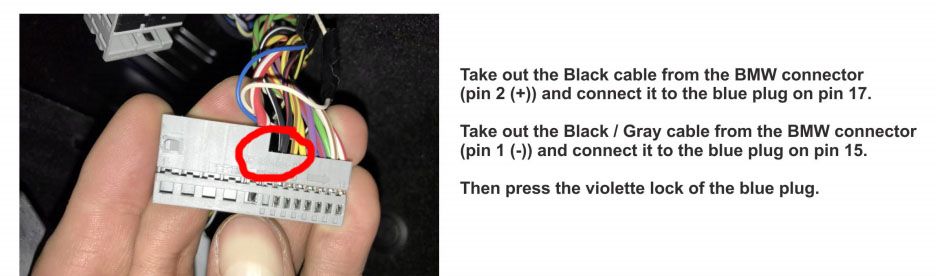
5. Pin the cables as in the diagram. On my USA Pure Impulse 2015 I had to switch the wires. If the wires are not correct the Maxhaust app will not recognize the different modes the car is in (ie, Sport, EcoPro, Comfort).

6. Connect the orange wires as below:
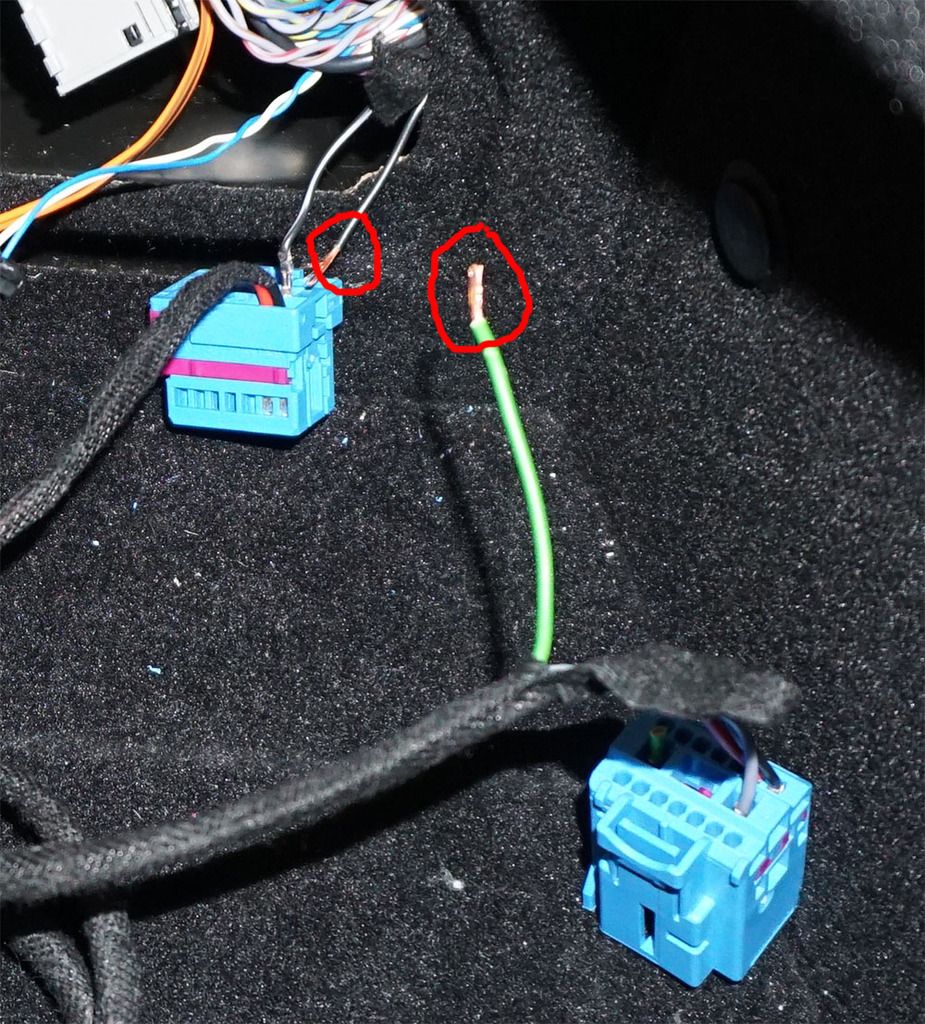
7. Plug wires into the blue plug.

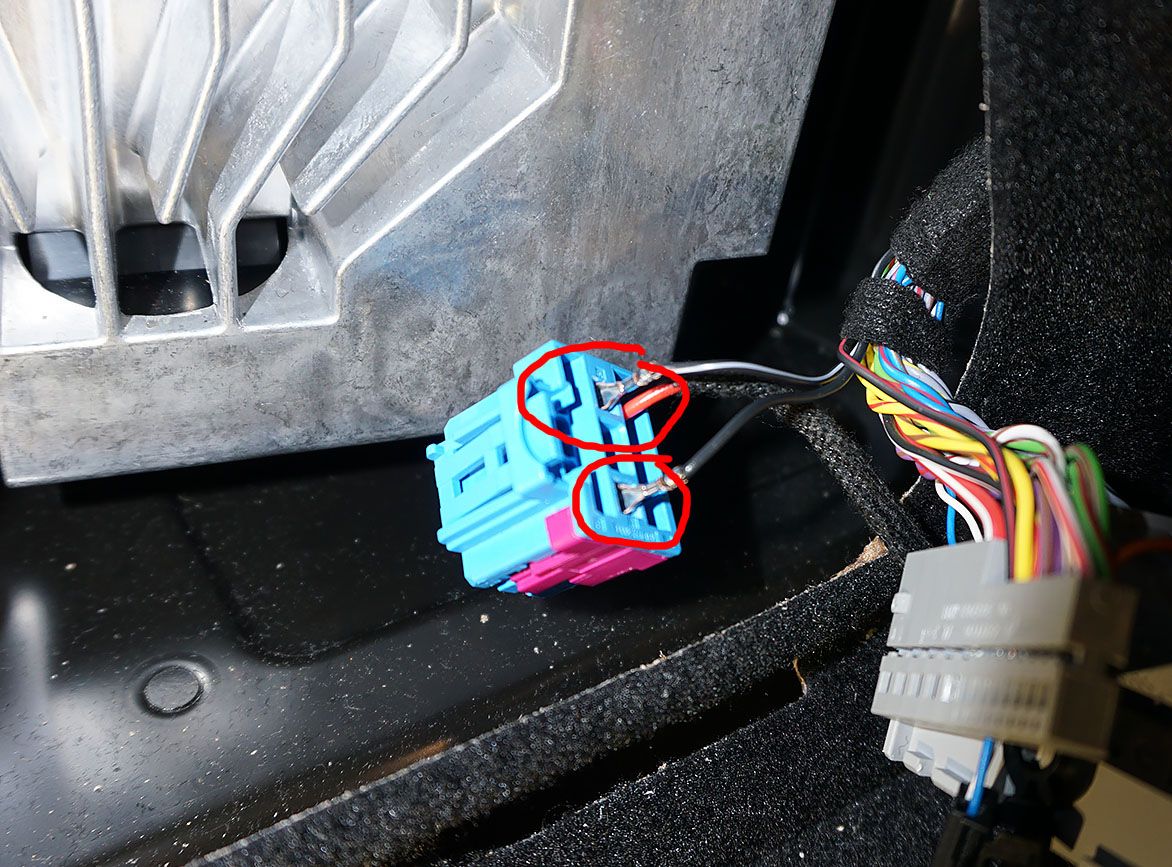
I inserted the wires in the blue plug, but when I later powered it on, the Maserati amplifier was not receiving power. The Bluetooth module was, as it is powered by the red and black wires you see on the plug. While trying to push the wires further in to make the connection, I snapped one of the plugs from the cable.

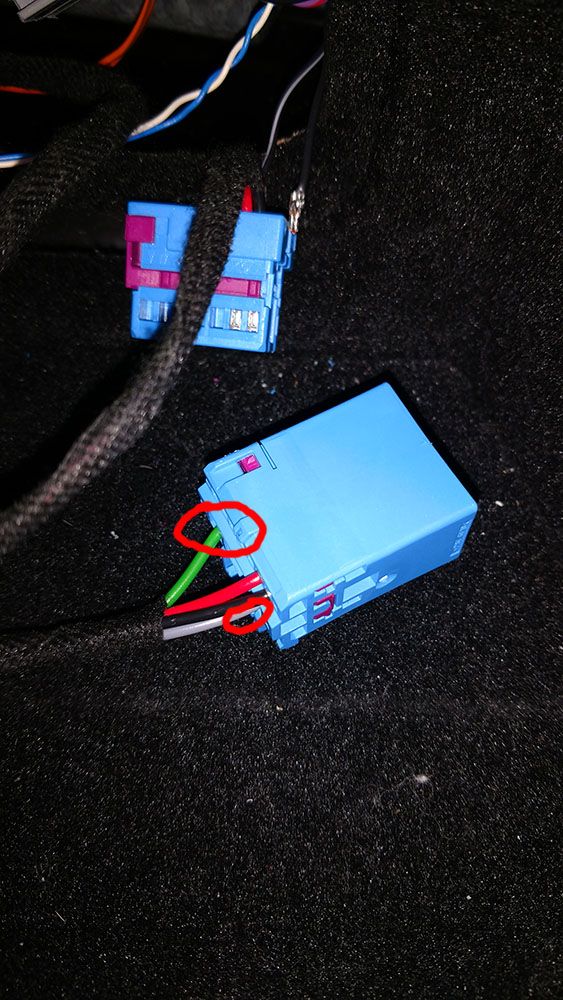
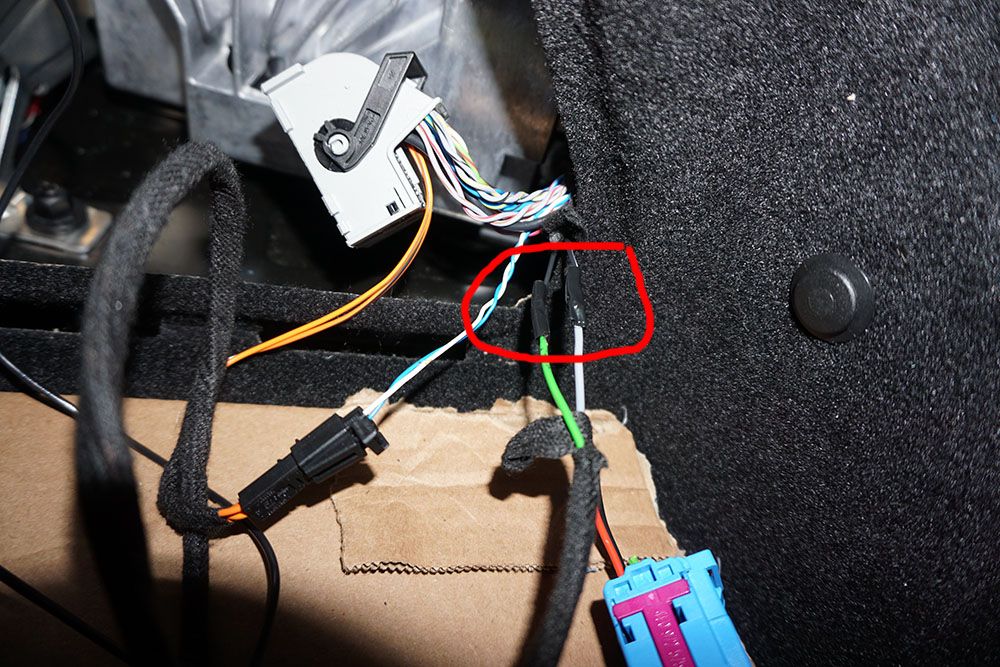
As a result, I decided to bypass the female blue connector and instead solder the wires from the male plug directly. I soldered the green wire to the black wire and the grey wire to grey/black wire.
I still attached the blue plugs together so power would go to the red and black wires for the Maxhaust Bluetooth module.
Here is where things got interesting. There were no instructions about running the wire from the amp in the trunk to the fuse box under the dash.
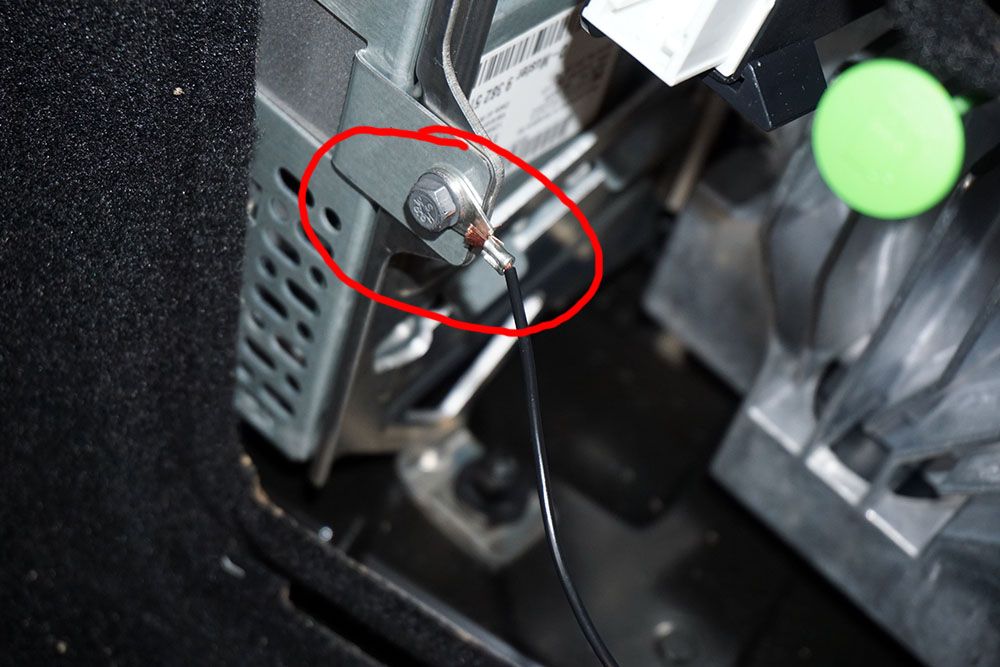
8. Ground the wire next to the amp. I used the screw near the amp held in place with the 8mm bolt.
9. Remove the back panels in the trunk. There are plastic plugs that you need to pop out using either a flathead or a plastic pry tool like this one with a forked end:
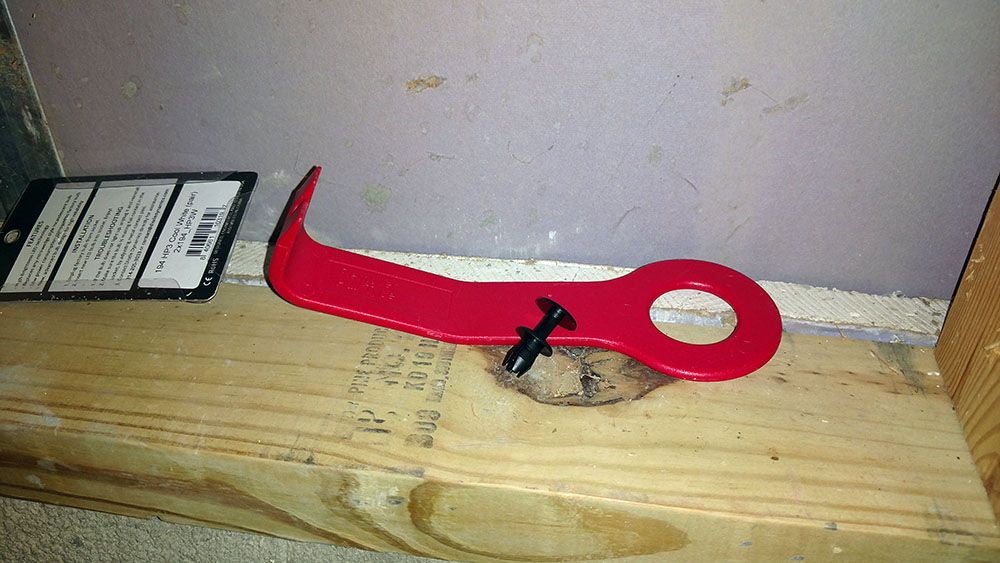
10. Remove the torx screws holding the panels in place.
When removing the panels you will needs to pry them out with your fingers or a non-marring pry bar like the red one shown. They are held in place by tabs which snap into place.
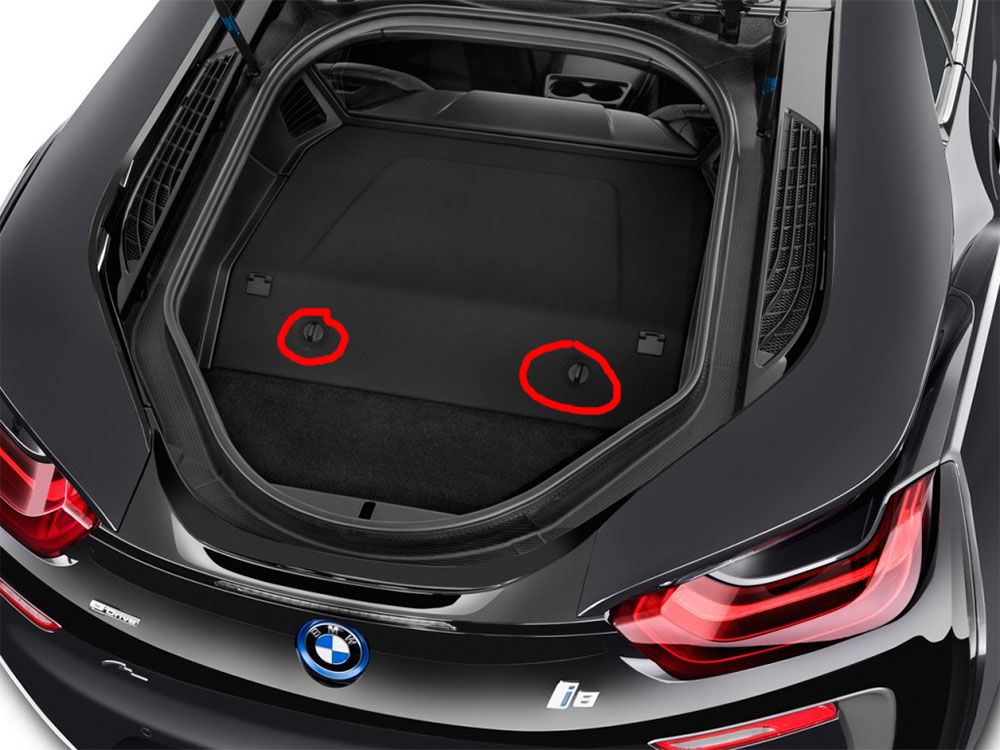
11. Remove the rear deck behind the window by simply turning the two knobs and lifting it off. This will make it easier to remove the side panels.
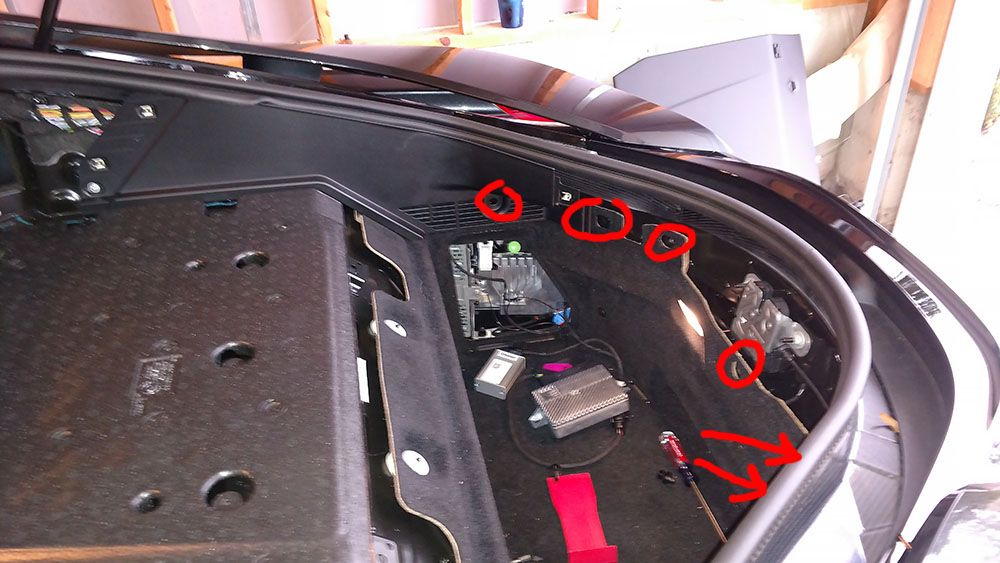
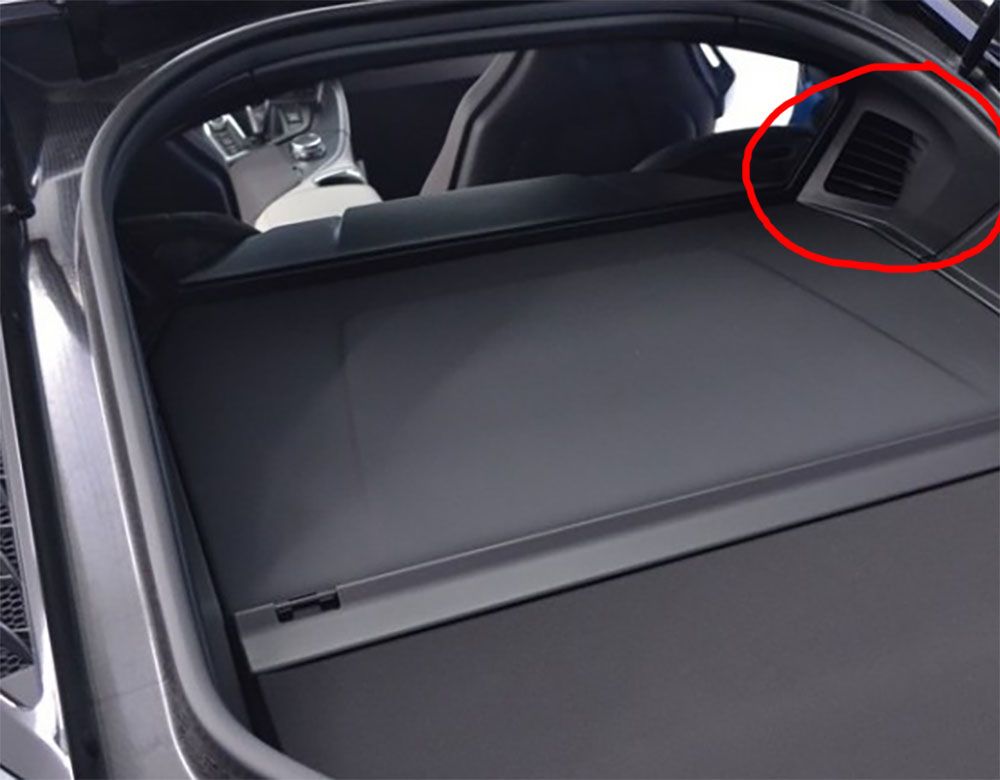
12. Remove the panel behind the glass on the right. It is held in place by tabs and needs to be pulled away with force. I left the middle panel in place as pictured and pulled it away from the rubber gasket running along the top to run the power cable. The power cable goes from the amp wiring along the conduit of cables heading toward the cabin.
13. Pull aside the rubber seal that goes around the opening in the corner of the trunk next to the glass and run the wire through.
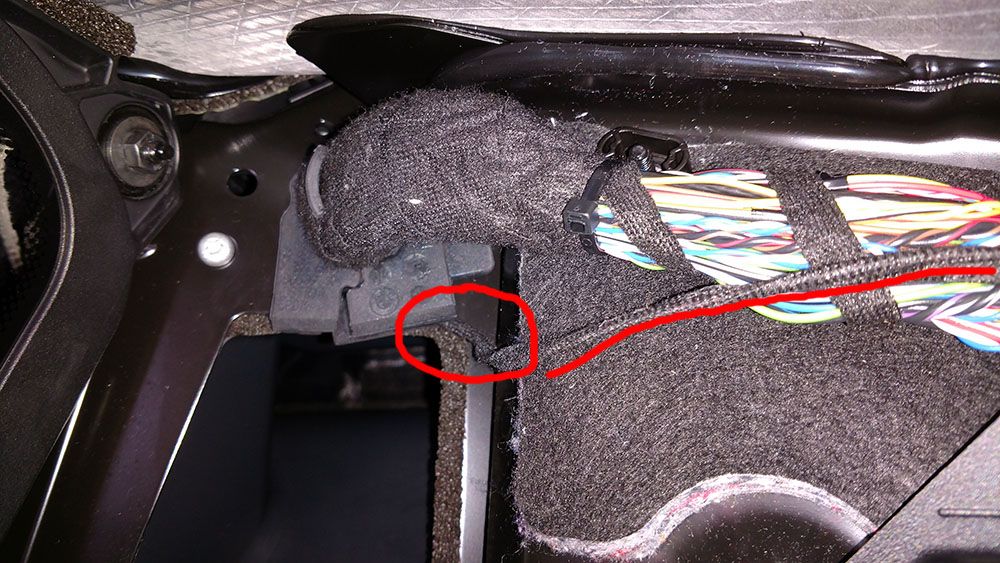
Now the fun part. To reach the wire from inside the cabin and run the wire to the fuse box, you will need to dismantle a fair amount of the interior.
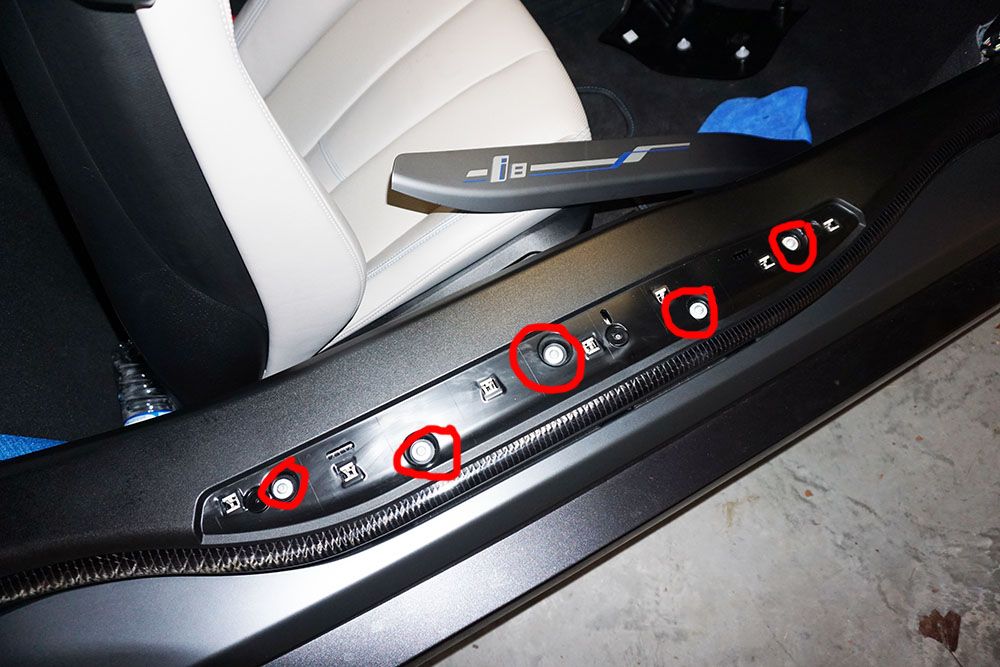
14. Remove the door sill. Under the grey plastic i8 plate are several hex screws. To access them pry off the grey plate using a non-marring pry bar. It is held in place by several clips. After the screws are removed you can lift off the door sill, disengaging the clips which hold it in place.
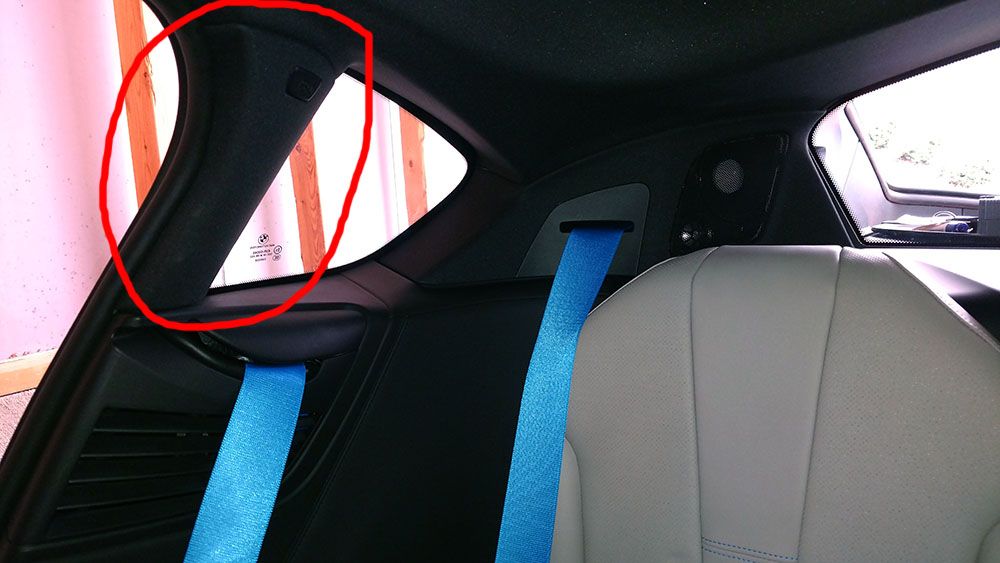
15. Remove the pillar cover with the plastic “Airbag” tab requires several steps. Start by prying off the plastic tab that says “Airbag”. Under it you will find a torx screw.
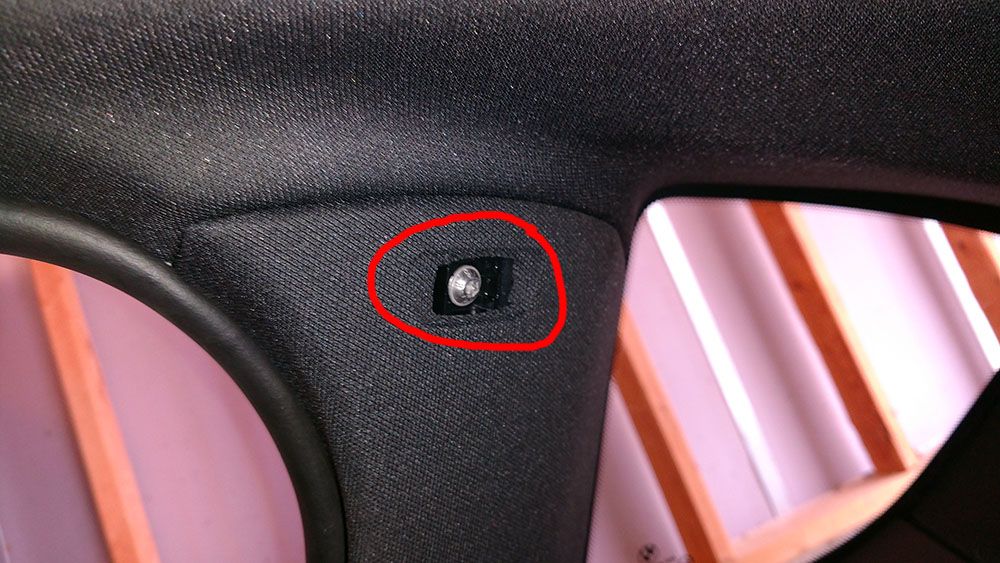
16. Remove the torx screw. Pry off the panel from the pillar. It needs to be pulled out and then down, as it tucks into the head liner. You may also need a band-aid by this point, there are some sharp items you will encounter running the wires.

17. With the cover gone, you will see another plastic tab that holds the door panel on. Remove the tab.

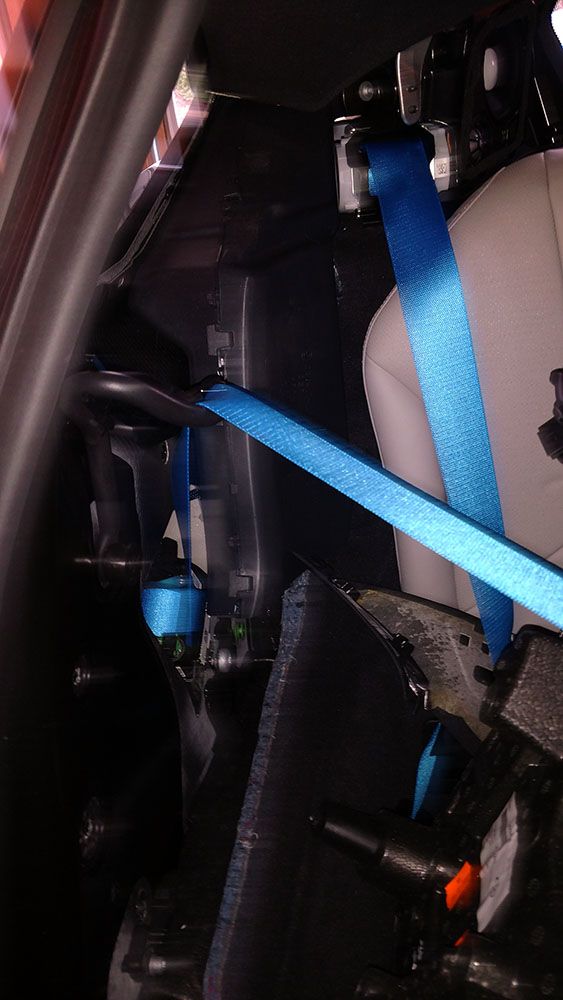
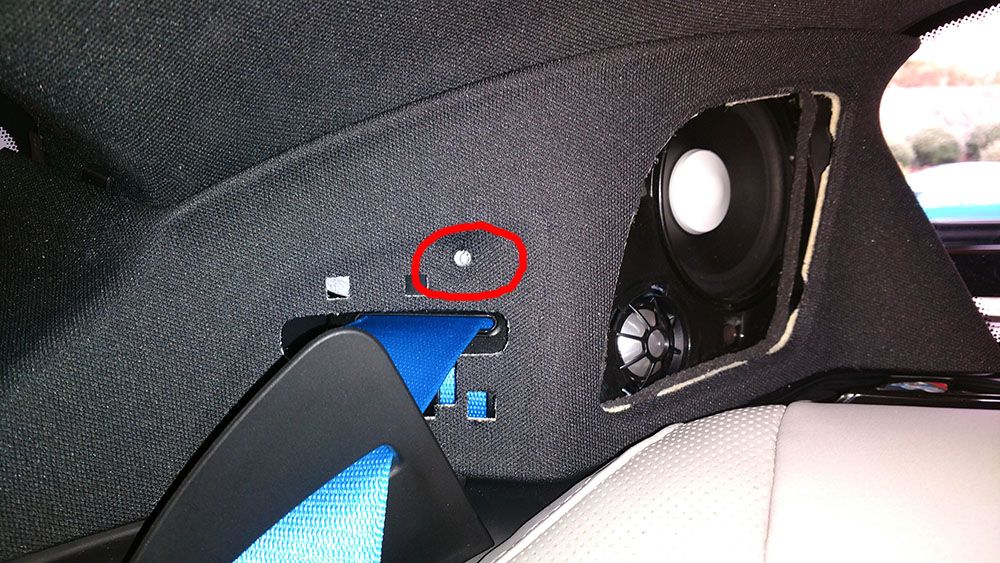
18. Remove the rear panel by the window covering the speaker. Pull the plastic seat belt cover away from the panel, revealing a small silver torx screw. With this screw removed, the panel will pull away from the wall.
19. You can now remove the rear panel. It has several green clips that hold it in place. You need to pull the panel away from the wall and the clips will release. Careful not to break the clips.